Linux has been the go to for web developers for as long as I can remember. I still prefer using a Linux machine for development specifically, but there are things that are just better in Windows. The most important one: Games 🎮

What is WSL?
WSL stands for Windows Subsystem for Linux. This is a completely new take on how to run Linux alongside Windows. We all have been running VMs on Windows or dual booting our systems to achieve this. But both of the above have there cons, for instance:
- VMs are resource heavy and don’t give the same performance as a native installation, especially noticeable on the more common consumer grade hardware.
- Dual booting on the other hand doesn’t allow you to run both at the same time. Also poses challenges when trying to access files of one OS from the other, let alone using programs installed across them.
Well, WSL aims at solving both the above problems and a bit more
The Windows Subsystem for Linux lets developers run a GNU/Linux environment — including most command-line tools, utilities, and applications — directly on Windows, unmodified, without the overhead of a virtual machine
- Microsoft
You can read more about it here.
How can I get it?
Prerequisites:
Well WSL is available on all editions of Windows since the Fall Creators Update. WSL2 is available on all editions starting the May 2020 update (if you haven’t received it yet head to Update Center to grab it).
How to enable it:
-
PowerShell:
- Press
⊞ Win+Xand choose Windows PowerShell (Admin) to open a PowerShell window with elevated rights. - Type/Paste the following command:
Enable-WindowsOptionalFeature -Online -FeatureName Microsoft-Windows-Subsystem-Linux - Press
-
Control Panel:
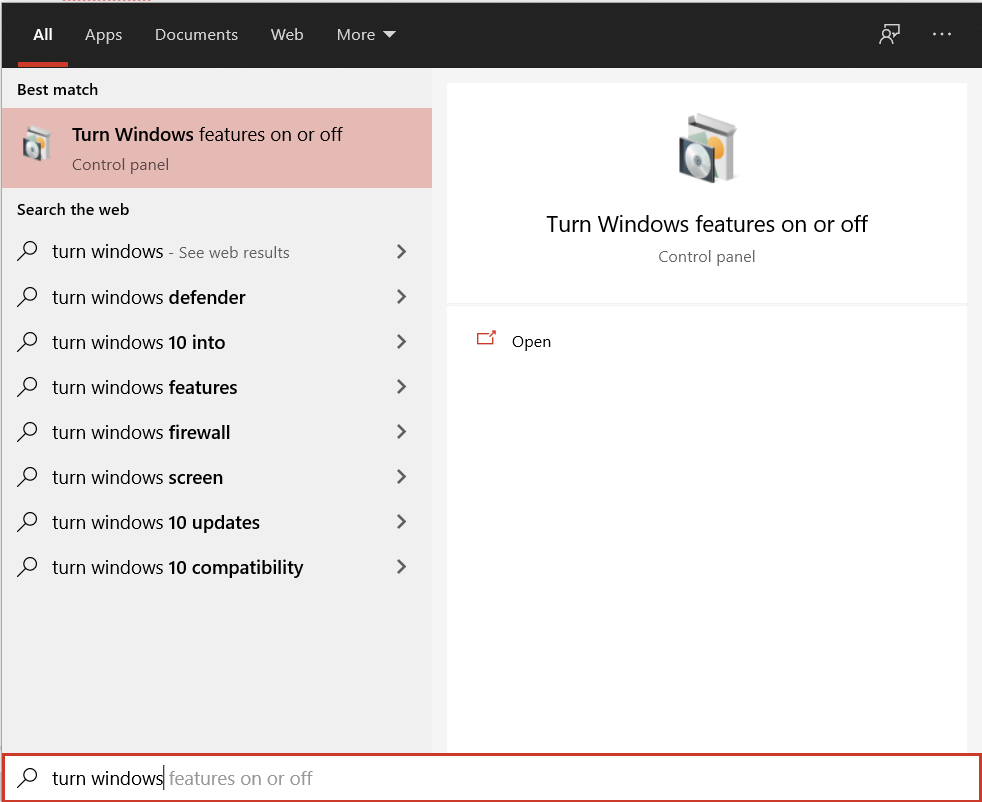
- Press
⊞ Winto open start menu. - Type Turn Windows features on or off
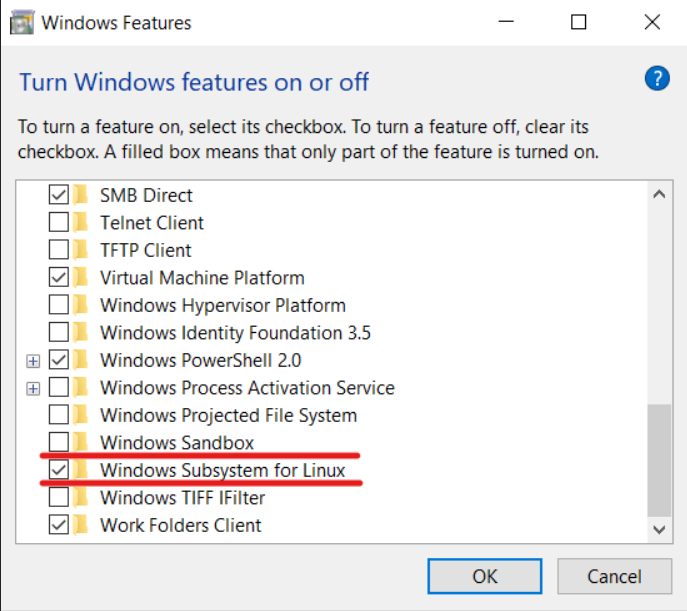
- In the window that opens scroll down and select the item Windows Subsystem for Linux
And that’s it, you have enabled WSL 🎉
- Press
Linux means Distros right?
UPDATE: If you want to try WSL 2 please head on to Upgrade to WSL 2 section below than come back here and follow the next steps.
Alternatively in the Windows PowerShell run
wsl --set-default-version 2before proceeding.
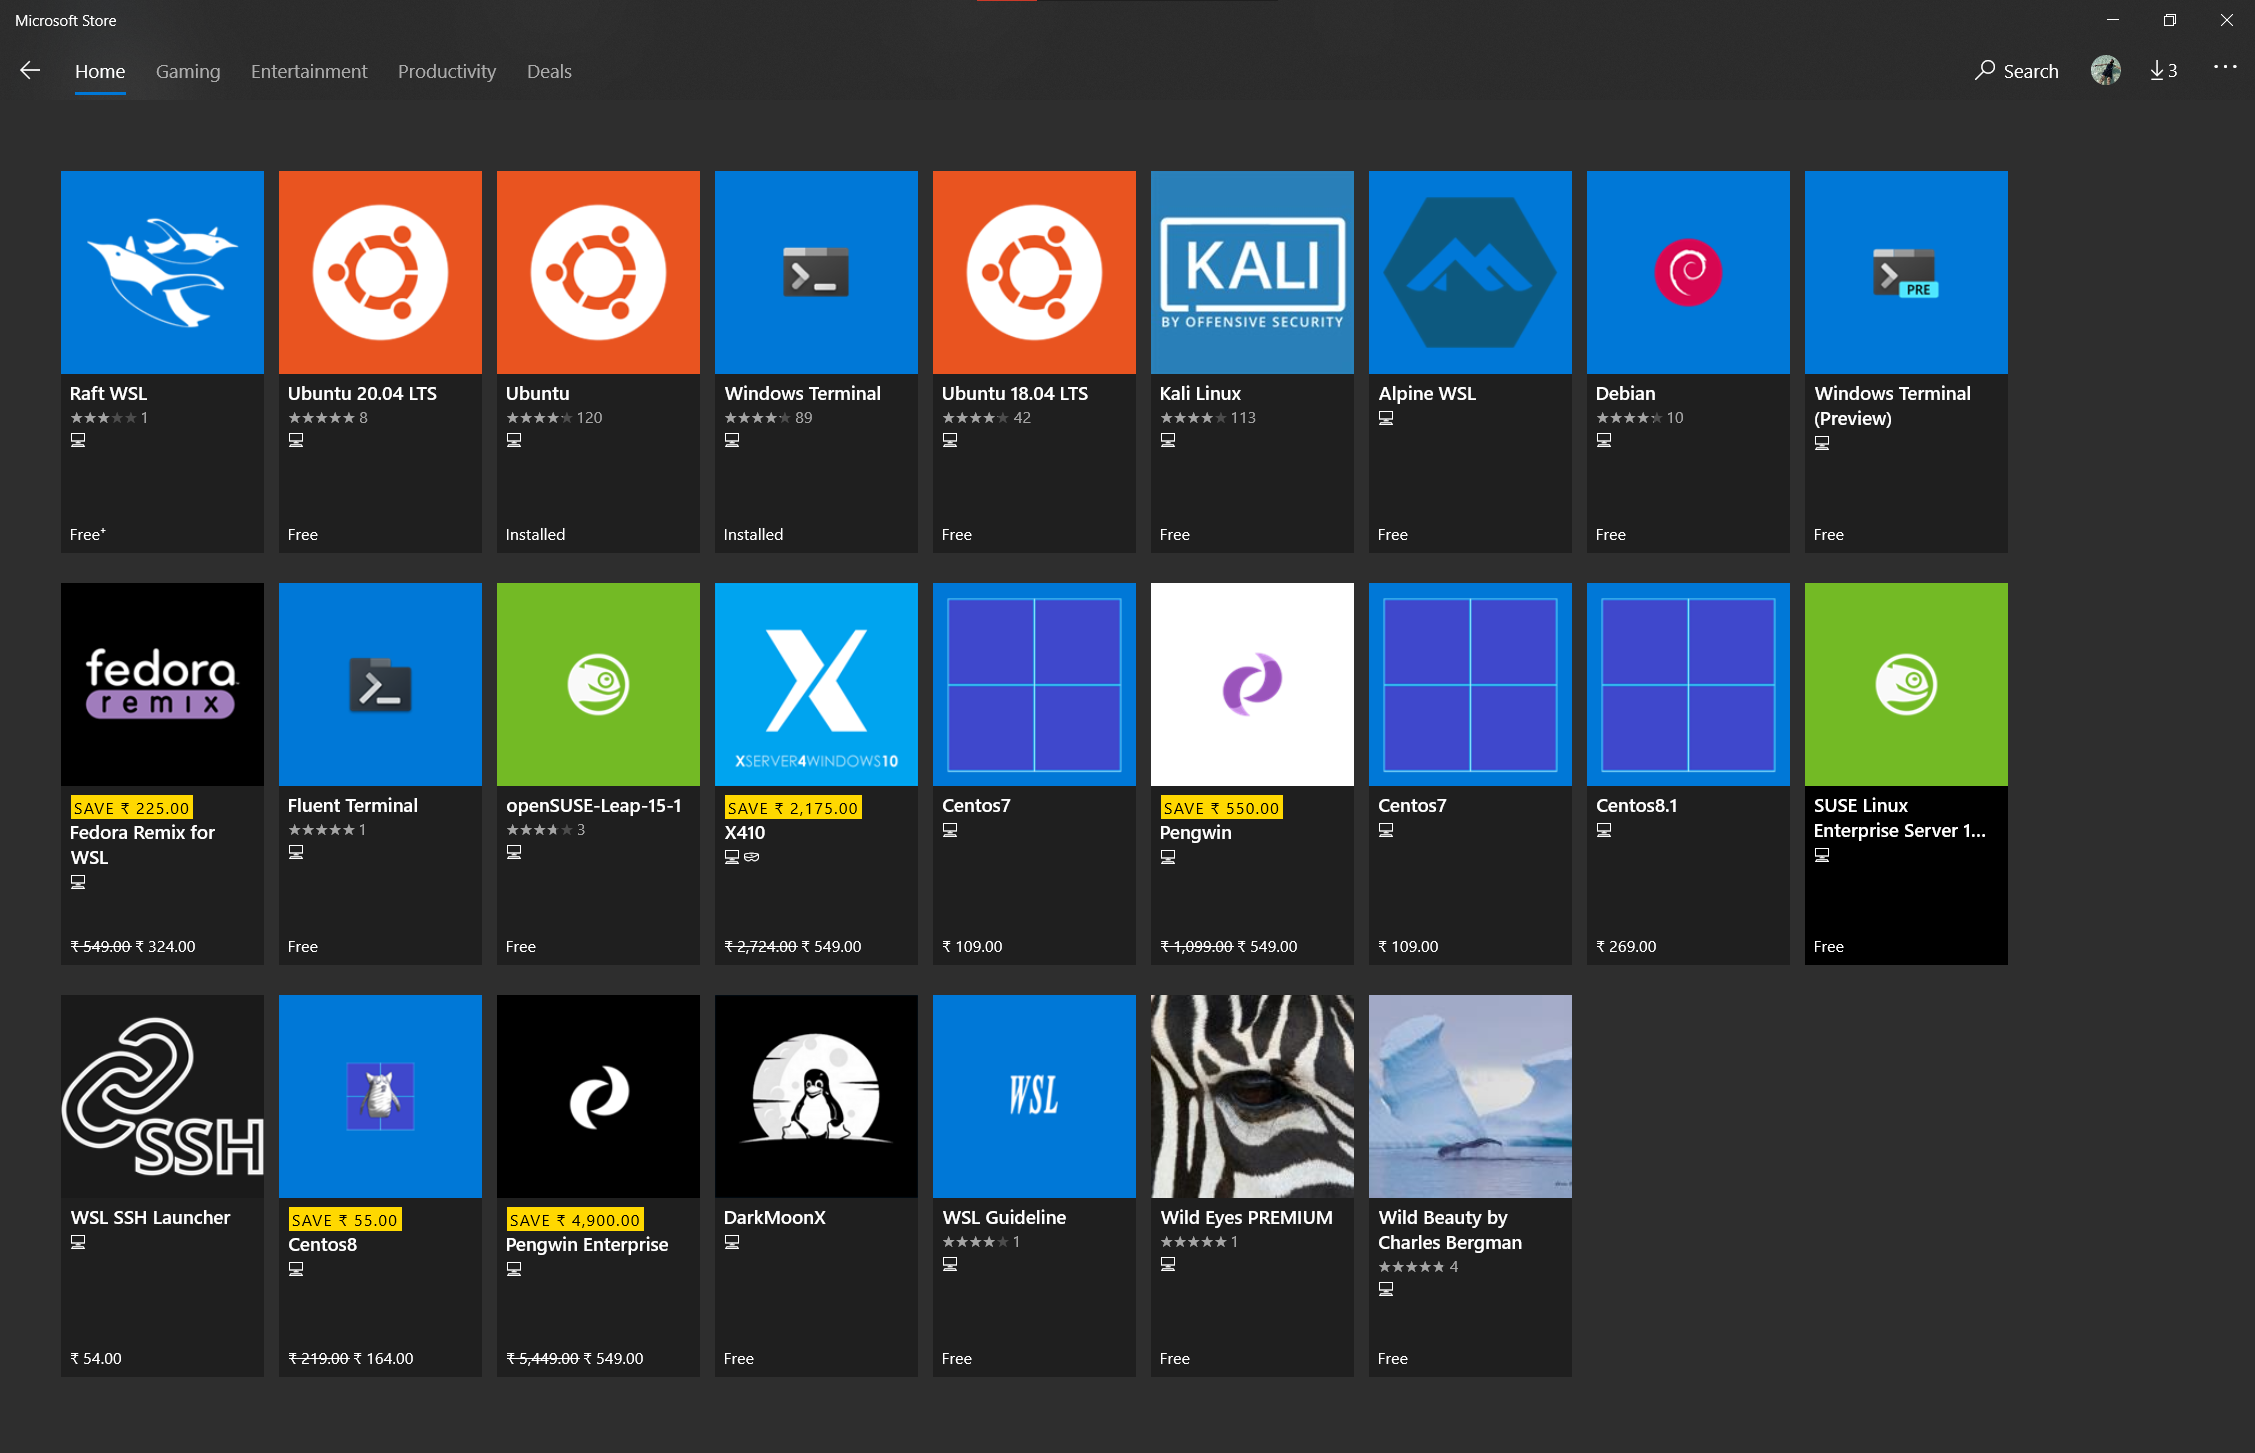
Well, yeah! Now that we have enabled WSL lets head on to the Microsoft Store to grab one of the available distributions. Yes you heard that right. We’ll be downloading Linux distribution just like any other app from the Microsoft Store!
-
Open the Microsoft Store and search for WSL
-
Select one of your liking. For this tutorial we’ll be using the Ubuntu distribution from Canonical.
-
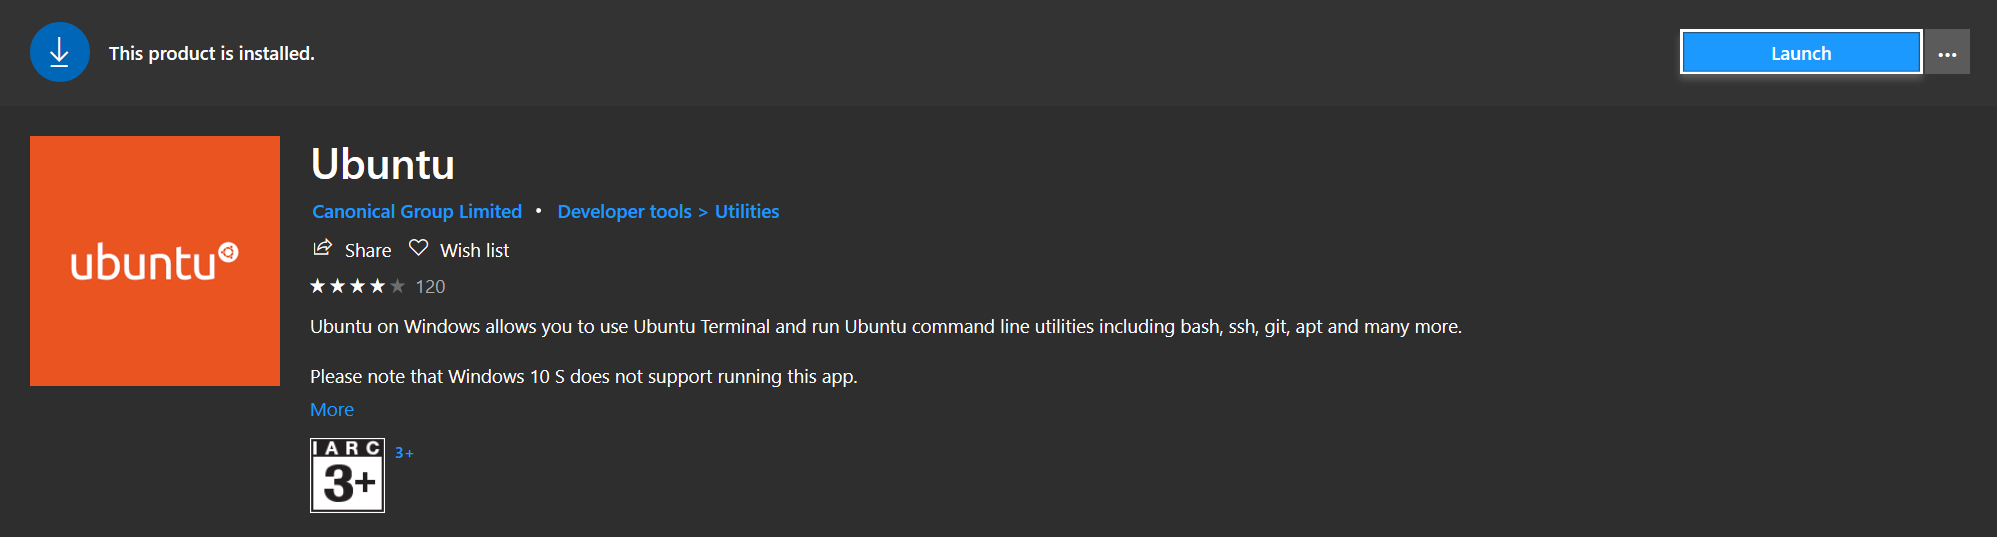
Once installed, we’ll have an Ubuntu app installed and accessible just like any other app from the Start Menu or a desktop icon or pinned to Task Bar.

-
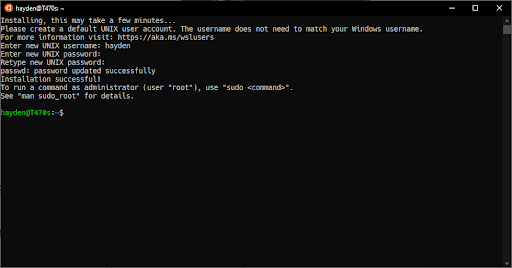
On launching it the first time it will install all dependencies and other stuff required for the distribution to work. Once done we’ll have a fully functional Linux terminal at our disposal inside of Windows. Bye bye Cygwin and Git Bash.
You’ll have to setup admin user and password for Linux.
WSL 1 vs. WSL 2
Now that we have WSL enabled and our distribution setup we can either choose to stay with WSL 1 or upgrade it to use the newly released WSL 2.
WSL 2 Improvements
WSL 1 was powered by Linux binary translation layer whereas WSL 2 is powered by a full fledged Linux kernel running on the Hyper-V technology. Hence Hyper-V support is a prerequisite to move to WSL 2.
WSL 2 also brings significant increase in file system performance, as well as adds full system call compatibility.
You can read more about WSL 2 here and comparison with WSL 1 and other caveats here.
Upgrade to WSL 2
-
Enable the Virtual Machine Platform feature:
dism.exe /online /enable-feature /featurename:VirtualMachinePlatform /all /norestart -
List currently installed Linux distributions:
wsl -l -v -
Choose the Linux distribution (Ubuntu in our case) and set the new version number to be used (2 in our case):
wsl --set-version Ubuntu 2PS: If the above command says you need to update your Linux Kernel click here to download and install the Kernel update (for 64-bit) and re-run the above command or head on to this page for more information.
PPS: This may take quite a bit of time depending on how big the Linux distribution is as it converts the entire file system to EXT4 and copies everything over there.
-
If we want to make all future Linux distributions to default to WSL 2 we can set it like:
wsl --set-default-version 2
Well this is all for Part 1 of this series. In the next part we’ll make Ubuntu much more functional by:
- OMZsh + Windows Terminal 💻
- Fix pathetic directory colors 🎨
- Install and setup VSCode to work with WSL ⚔
- Work with Linux GUI apps 👓