If you haven’t read Part 1 of the series or don’t have WSL installed yet please read that first, I’ll be waiting for you here!

Now that we’ve already setup the basic Ubuntu terminal on WSL it looks, well, pretty darn unpleasant. There are a couple of things which look pretty out of place the most obvious ones are the default fonts and the directory colors, yuk!
So let’s start customizing it to make it look as sleek as possible.
Installing Oh My Zsh!
Well most of you must be familiar with the Z shell already. If you haven’t heard about it this is a shell replacement for bash which comes with handy plugins to ease our most common workflows, custom aliases and pretty themes.
-
Install Z shell:
sudo apt install zsh -
Make it your default shell:
chsh -s $(which zsh) -
Install Oh My Zsh:
sh -c "$(curl -fsSL https://raw.github.com/ohmyzsh/ohmyzsh/master/tools/install.sh)"
Now restart your Ubuntu shell to be greeted with the Oh My Zsh terminal.
You can change the theme to your liking by editing the ~/.zshrc file:
-
nano ~/.zshrc -
# Find and change this
ZSH_THEME="robbyrussell"

# To this or any of the many themes found here: https://github.com/ohmyzsh/ohmyzsh/wiki/Themes
ZSH_THEME="agnoster"
You’ll notice one thing, that for some of the fonts are all messed up now. Don’t worry we’ll fix those in the next step.
Installing Powerline Fonts
-
git clone https://github.com/powerline/fonts.gitMake sure to clone this to a Windows directory under
/mnt/as we need to execute the PowerShell script on Windows. -
Start a PowerShell instance as Administrator and execute the following script to install all the Powerline fonts:
.\install.ps1
Fix directory colors
You must have notices by now if you started using the Ubuntu bash that the directory colors are just awful. We’ll be using the Solarized color palette from here.
- Choose the one that suits you.
-
Fetch the chosen directory colors to directory on the Ubuntu file system.
# using dircolors.ansi-dark curl https://raw.githubusercontent.com/seebi/dircolors-solarized/master/dircolors.ansi-dark --output ~/.dircolors -
Update
~/.zshrcby adding the following lines to use the directory colors## set colors for LS_COLORS eval `dircolors ~/.dircolors`
Configure VS Code to work with WSL
Microsoft has provided a pretty cool integration for VS Code to access files on WSL.
- Install VS Code on Windows. Make sure to Select Additional Tasks during installation, and be sure to check the Add to PATH option so you can easily open a folder in WSL using the
codecommand. -
Install the Remote Development extension pack or just the Remote WSL extension.
-
Now we’ll edit the
~/.zshrcfile to allow us open WSL files in explorer and also to redirect output of thecodecommand to not block the terminal instance while its running.nano ~/.zshrcAdd the following lines:
# User configuration

# Hide the user and computer name in our prompt
DEFAULT_USER=$USER

# Alias to open explorer in the current directory, returning true to override explorer's failure
alias e.="explorer.exe . || true"

# Alias to open visual studio code and blackhole its output
alias c.="code . > /dev/null"

# Function to delegate to Windows to open each of its arguments
start() {
   for file in "$@"
   do
       cmd.exe /C "$file"
   done
}

# File-based tab completion for the start function above
compdef _files start
Useful Oh My Zsh Plugins
There is a huge and ever growing list of Oh My Zsh plugins. Here I’ll list a few of the very useful ones which I’ve been using everyday to increase my productivity.
-
Provides a handful of aliases and functions for normal git commands we use everyday.
-
Easily jump around in the file system using indexed history without having to type in full directory paths.
-
Enable syntax highlighting in Ubuntu shell.
git clone https://github.com/zsh-users/zsh-syntax-highlighting.git ${ZSH_CUSTOM:-~/.oh-my-zsh/custom}/plugins/zsh-syntax-highlighting -
This plugin adds suggestions to your commands as you type them based on history and completions.
git clone https://github.com/zsh-users/zsh-autosuggestions ${ZSH_CUSTOM:-~/.oh-my-zsh/custom}/plugins/zsh-autosuggestions -
Finally add all the above to
~/.zshrcplugins list:plugins=( ... git z zsh-syntax-highlighting zsh-autosuggestions )
PS: You can find a full list of official plugins here.
Windows terminal
So we’ve setup WSL and Oh My Zsh and have been using the Ubuntu app until now. But Microsoft has a great new open source offering: Windows Terminal.
It is awesome for quite a couple of reasons:
- Can be used as a replacement for Command Prompt and PowerShell both. ⚒
- Has tab support for multiple different session(s). Supports simultaneous Command Prompt, PowerShell, WSL. 🥊
- Theme support 🎨
Windows terminal can be installed from the Microsoft Store.
Here’s a snippet of my WSL configuration for Ubuntu in Windows Terminal:
"profiles": [
  {
    "guid": "{2c4de342-38b7-51cf-b940-2309a097f518}",
    "hidden": false,
    "name": "Ubuntu",
    "source": "Windows.Terminal.Wsl",
    "fontFace": "MesloLGS NF", // If you don't have this use any other Powerline fonts we installed.
    "fontSize": 12,
    "padding" : "0, 0, 0, 0",
    "snapOnInput" : true,
    "startingDirectory" : "//wsl$/Ubuntu/home/${USER}/workspace",
    "closeOnExit" : true,
    "colorScheme" : "VS Code",
    "historySize" : 9001,
    "cursorColor" : "#FFFFFF",
    "cursorShape" : "bar"
   }
 ],
 "schemes": [
   {
      "name": "VS Code",
      "background" : "#232323",
      "black" : "#000000",
      "blue" : "#579BD5",
      "brightBlack" : "#797979",
      "brightBlue" : "#9BDBFE",
      "brightCyan" : "#2BC4E2",
      "brightGreen" : "#1AD69C",
      "brightPurple" : "#DF89DD",
      "brightRed" : "#F6645D",
      "brightWhite" : "#EAEAEA",
      "brightYellow" : "#F6F353",
      "cyan" : "#00B6D6",
      "foreground" : "#D3D3D3",
      "green" : "#3FC48A",
      "purple" : "#CA5BC8",
      "red" : "#D8473F",
      "white" : "#EAEAEA",
      "yellow" : "#D7BA7D"
   },
 ]
You can find more color schemes from Microsoft and the community.
Linux GUI apps on WSL
Until now we have worked with the Linux terminal in WSL and tweaked and customized it to our liking. But there are times when we would like to work with GUI apps like Gitk or Terminator (if you didn’t really like any terminal offerings for Windows). Well WSL doesn’t natively support GUI apps out of the box. But no worries we can still run them 🎉
To achieve this we’ll use an X server like VcXsrv (or any other that you prefer) and direct WSL’s display to the X server running on Windows.
- Install VcXsrv.
-
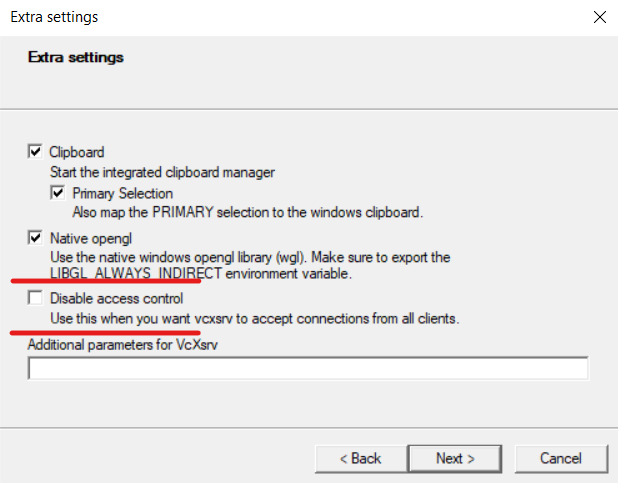
Launch VcXsrv once installed.
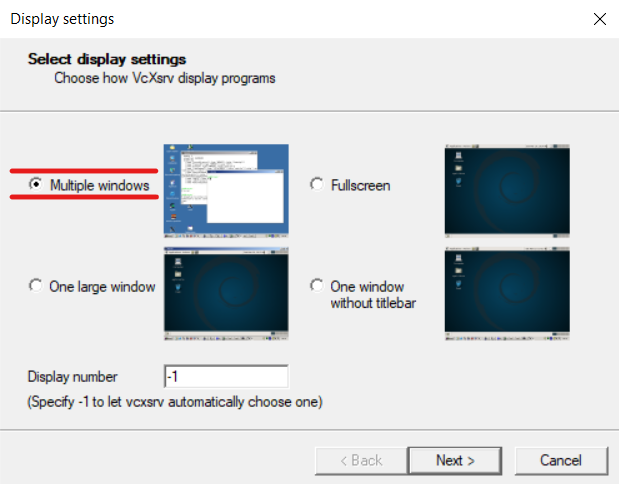
NOTE: If using WSL 2 make sure to check the box to “Disable Access Control”.
-
Launch Ubuntu Terminal and add the following lines to
~/.zshrc# For WSL 1 export DISPLAY=:0 # For WSL 2 # Export display to support XServer (rquired for GUI apps with WSL) export DISPLAY=$(awk '/nameserver / {print $2; exit}' /etc/resolv.conf 2>/dev/null):0 export LIBGL_ALWAYS_INDIRECT=1
Now we can use Linux GUI apps on Windows 😎
Bonus
Here are a few bonus items for you to consider ❤
Docker
Well docker has become an integral part of development workflows lately. Getting docker to work with WSL involves a few extra steps which I’ll detail below:
- Install Docker for Windows.
-
Launch Docker for Windows and go to the Settings tab.
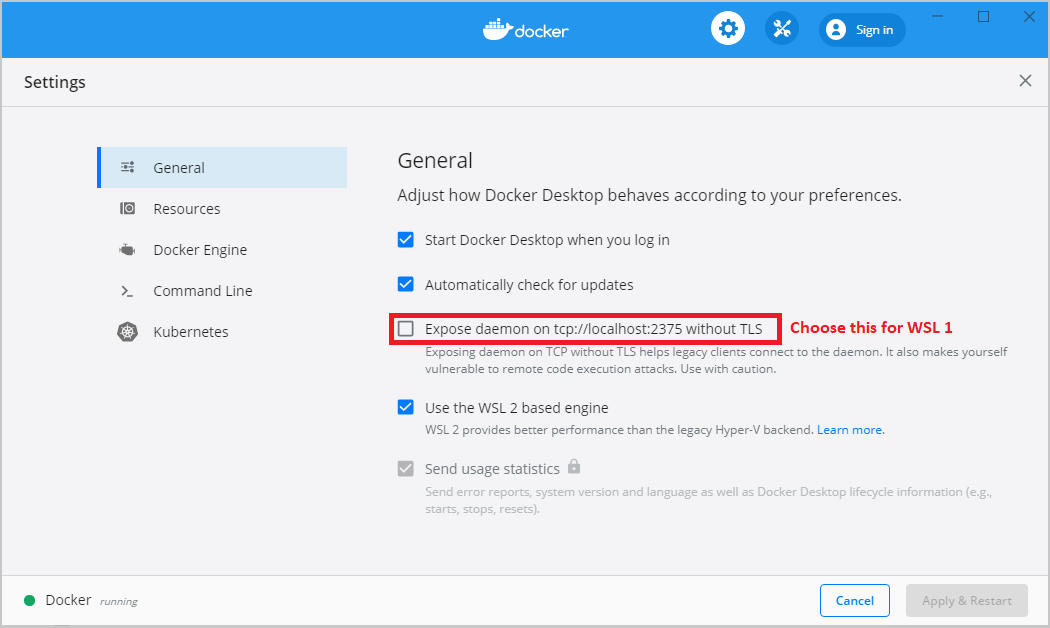
NOTE: Choose Expose daemon on TCP without TLS for WSL 1.
If you’re on WSL 2 that’s it. Read on if you’re on WSL 1 or upgrade your distribution to WSL 2.
-
Install Docker. The following is taken form Ubuntu 18.04 installation notes taken from Docker’s documentation:
# Update the apt package list.
sudo apt-get update -y

# Install Docker's package dependencies.
sudo apt-get install -y \
   apt-transport-https \
   ca-certificates \
   curl \
   software-properties-common

# Download and add Docker's official public PGP key.
curl -fsSL https://download.docker.com/linux/ubuntu/gpg | sudo apt-key add -

# Verify the fingerprint.
sudo apt-key fingerprint 0EBFCD88

# Add the `stable` channel's Docker upstream repository.
#
# If you want to live on the edge, you can change "stable" below to "test" or
# "nightly". I highly recommend sticking with stable!
sudo add-apt-repository \
  "deb [arch=amd64] https://download.docker.com/linux/ubuntu \
  $(lsb_release -cs) \
  stable"

# Update the apt package list (for the new apt repo).
sudo apt-get update -y

# Install the latest version of Docker CE.
sudo apt-get install -y docker-ce

# Allow your user to access the Docker CLI without needing root access.
sudo usermod -aG docker $USER
You might want to restart the terminal to be able to run Docker with
sudoat this point. -
Install Docker Compose. The following is taken form Ubuntu 18.04 installation notes taken from Docker’s documentation:
sudo curl -L "https://github.com/docker/compose/releases/download/1.26.0/docker-compose-$(uname -s)-$(uname -m)" -o /usr/local/bin/docker-compose sudo chmod +x /usr/local/bin/docker-compose -
Add the following to
~/.zshrcto allow the Docker service to communicate with the daemon running on Windows.# Connect to remote (windows) Docker Daemon export DOCKER_HOST=tcp://localhost:2375
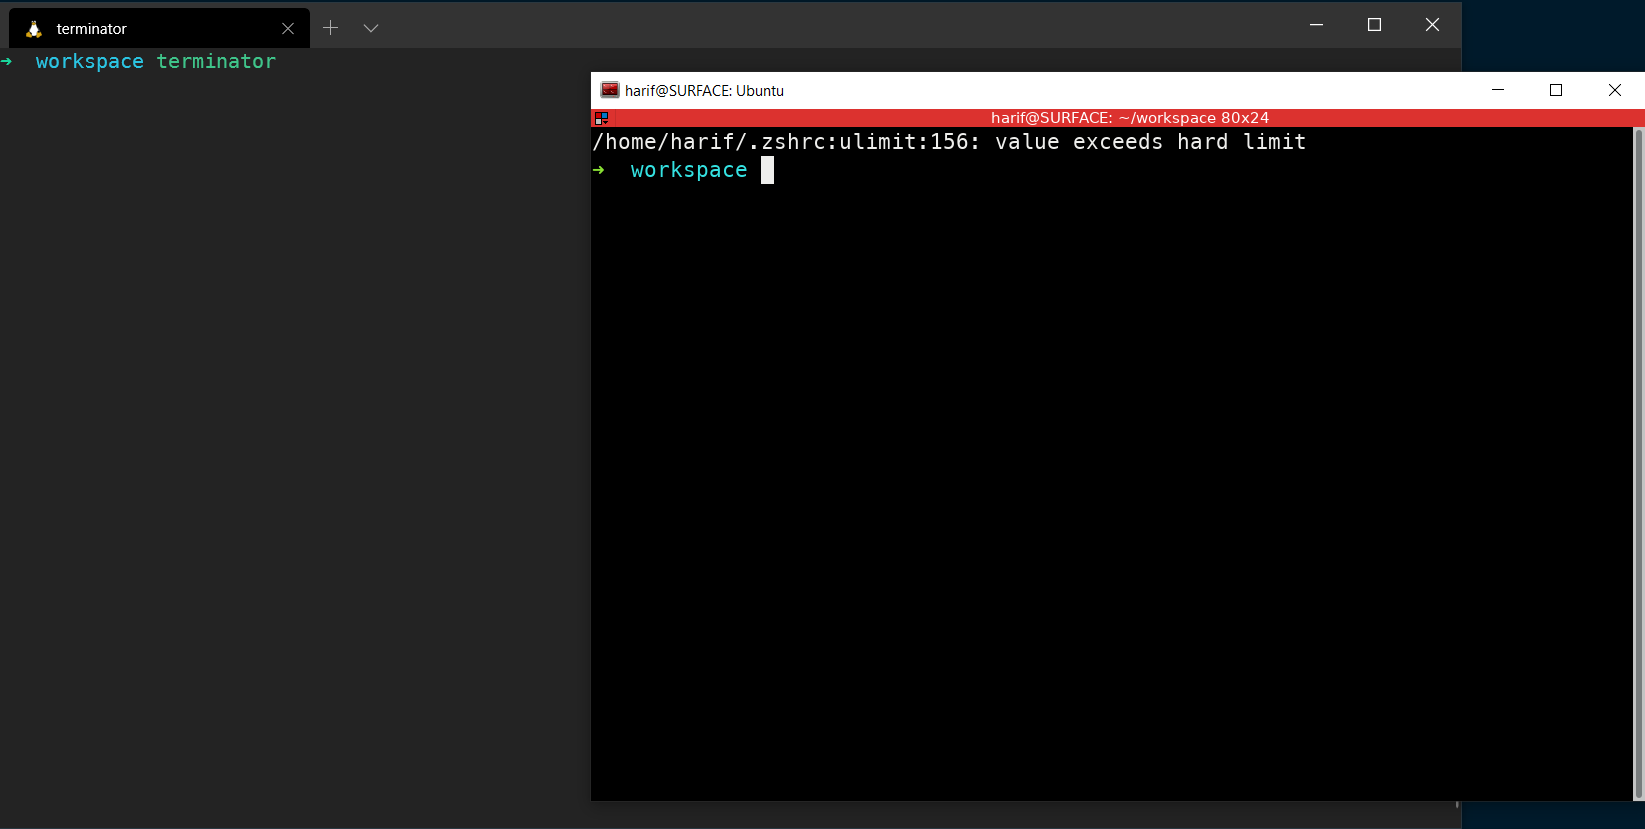
Desktop shortcut to launch Terminator
Now since we’ve setup a X server to run GUI apps with WSL it would be great to create a desktop shortcut to one of our favorite terminal emulators Terminator.
-
Create a
.vbsfile and paste the following in it:' terminator.vbs myCd = "/mnt/c/Users/huzai" If WScript.Arguments.Length > 0 Then myCd = "'$(wslpath -u '" & WScript.Arguments(0) & "')'" End If args = "bash" & " -c ""cd " & myCd & "; DISPLAY=$(awk '/nameserver / {print $2; exit}' /etc/resolv.conf 2>/dev/null):0 terminator""" WScript.CreateObject("Shell.Application").ShellExecute "C:\Windows\System32\wsl.exe", args, "", "open", 0If using WSL 1 replace Line 6 with:
args = "bash" & " -c ""cd " & myCd & "; DISPLAY=:0 terminator""" -
Create a shortcut on Desktop to
wscript.exeand execute it with the following:C:\Windows\System32\wscript.exe C:\Users\huzai\startTerminator.vbs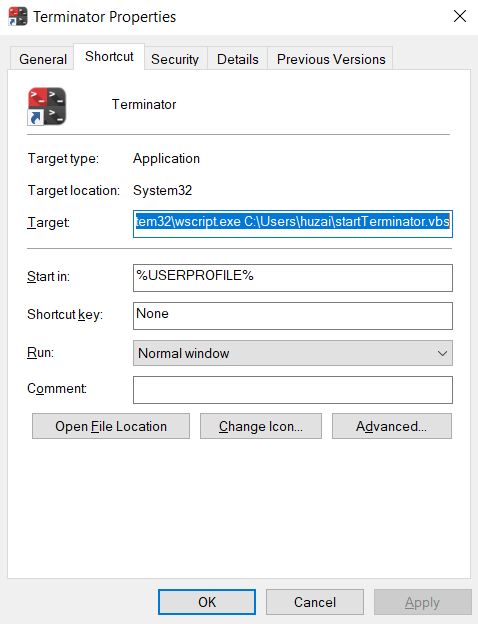
-
The last step is to find a pretty Terminator Icon file for the shortcut and pin it to the taskbar for quick launching. 😁
PS: VB Script original source.